Gift Certificates Available! Our custom boots make great corporate gifts!
Making Custom Boots
Measurements
Last is built
Last is built
We start with detailed measurements of the feet. Over eight precise measurements are taken. Tracings as well as imprints of the feet are made. This information is used to build out the custom lasts that will be the form for your custom boots.
Last is built
Last is built
Last is built
The information gathered from the measurements and imprints is then transferred to the lasts. The last is a form, usually of wood or plastic, that represents the form of the foot. The lasts are built out to represent the measurements and any special characteristics of the feet.
Patterns made
Last is built
Patterns made
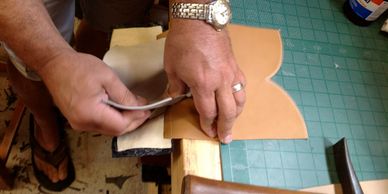
After the last is built out, the patterns are cut from the client’s skin selection. A set of patterns is made for each individual pair of boots. Some clients have a clear vision as to what they want on their boot tops. Inspiration comes from many places. Some clients prefer simple stitching. We can help with design to ensure your vision is created.
Artwork
Top Assembly
Patterns made
All of the pieces are cut and the artwork and stitching is perfected for the client’s unique boots.
Stitching
Top Assembly
Top Assembly
The pieces are then hand stitched on a one hundred year old commercial flat bed sewing machine.
Top Assembly
Top Assembly
Top Assembly
The tops are assembled first. Then the vamps (or front part of the boot) are attached to the tops.
Counters placed
Counters placed
Counters placed

Next the counter (or firm leather heel piece) is attached to the tops. This is a critical piece since it is the stability that holds the heel in place.
Side seam
Counters placed
Counters placed
After the fronts and backs are completed they are placed together inside out and sewed up the sides. The boot is then turned right side out and ready for lasting.
Ready to last
Counters placed
Ready to last
The boot is then dampened so the leather becomes pliable and it is stretched over the last.
Toe Box
Shank and Pegging
Ready to last

The toe box is then put in place. This is the hard piece in the end of the toe that keeps the toe from collapsing.
Welt
Shank and Pegging
Shank and Pegging
The welt is now stitched around the forepart of the boot. Most “cowboy” styled boots have a three quarter welt which means that it goes from ball to ball. This boot is a roper style shown and the welt goes all the way around to meet the heel.
Shank and Pegging
Shank and Pegging
Shank and Pegging
We are now ready to place the iron shank in the boot. This gets covered and our next step is soles. The soles are placed and trimmed. They are stitched and then finally pegged with wood pegs.
Heels
Completion
Completion
Heels are then stacked and a rubber cap is placed on the bottom for wear. The boots are inked and finished.
Completion
Completion
Completion

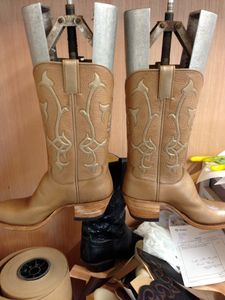
The last step in the process is to tree out the tops and give them a final cleaning and polishing. Then, your perfect fitting custom boots are complete!